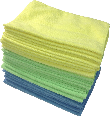
Removing Burnt Microfiber Cloth from a Porcelain Cooktop
Written by Lee Wyatt (last updated May 6, 2024)
Have you noticed how popular both microfiber cloths and porcelain cooktops have become in recent years? With this increase in popularity there are bound to be some unique accidents that crop up over time. For example, leaving a microfiber cloth on your cooktop only to have it end up getting burnt. Don't worry though; removing burnt microfiber cloth from a porcelain cooktop isn't hard. Just follow these directions.
- Set heat to low. Turn the burner that has the burnt microfiber cloth to low heating. Once you have done that, allow the heat to work on the burnt cloth for a while. Ideally this should help loosen, or re-melt, the cloth fibers. If it doesn't look like it is working with the low heat, take it up to the next highest level.
- Turn off heat and wipe. After the fibers have started to loosen up a bit, turn the burner back off. Grab several paper towels (you don't want to get burned) and gently wipe away the melted gunk. Chances are you will not be able to remove every bit of the melted fibers, but you should be able to get the majority of it.
- Allow surface to cool. If there is any remaining mess on the burner, allow the burner to completely cool. The reason is that you will need to do a bit deeper cleaning.
- Prepare cleaning agent. While the surface is cooling, you can go ahead and begin preparing your cleaning agent. To do this, get a baking sheet and pour a thin layer of vinegar into it. Lay down several paper towels, and let them soak up the vinegar.
- Apply agent. Once the surface of the stove has completely cooled go ahead and apply your cleaning agent. Place the vinegar soaked paper towels directly onto the mess, and let it sit for at least fifteen minutes.
- Remove and scrape. Remove the paper towels and dispose of them properly. Gently scrape away at the remaining mess on the burner, but do not use a scraper that is too tough or harsh. Ideally you will want to use something like a silicone or plastic scraper. Be as gentle as you can, or you may end up damaging the surface of the stove.
- Clean and inspect. Once you are satisfied that you have removed as much of the melted microfibers as possible, go ahead and clean up the area as you normally would. After doing that, inspect the area to see if there is any remaining residue If there is, then you will want to repeat steps four through seven as many times as necessary to get the stove clean.
This cleaning technique definitely removes the burnt microfibers from a porcelain stove, just keep in mind that you may have to use a bit of careful elbow grease and patience to see it all the way through. That being said, your best bet would be to avoid the problem in the first place. This means always ensuring that you turn off the stove when you are not using it, and being very careful about where you place any cleaning towels in the future.
Author Bio
Lee Wyatt
Contributor of numerous Tips.Net articles, Lee Wyatt is quickly becoming a regular "Jack of all trades." He is currently an independent contractor specializing in writing and editing. Contact him today for all of your writing and editing needs! Click here to contact. Learn more about Lee...
Fixing Broken Tiles
Broken tiles in the bathroom, kitchen, entryway or living room no longer have to be a source of embarrassment to you. ...
Discover More
Spinach and Cheese Stuffed Chicken
It's that time of the week again, your turn to come up with a meal for dinner, but you have no idea what to make. Well, ...
Discover More
How to Test-Drive a Car
It can be loads of fun going out and getting a new car, but unfortunately many people view the test drive phase as ...
Discover More
Cleaning Self-Cleaning Ovens
It is always wise to follow the manufacturer's instructions when using your self-cleaning oven. It is also good to resist ...
Discover More
Removing Burn Stains from Porcelain Range Tops
Second only to gas stoves in popularity, porcelain and other kinds of flat-topped ranges are a favorite among homeowners ...
Discover More
Cleaning the Range Hood
You can spend hours scrubbing your oven and range, but the whole job isn't done until you've cleaned your range hood. ...
Discover More

Comments