Cleaning a Car Headlight

Written by Doris Donnerman (last updated June 11, 2018)

Just as in any cleaning task, in order to properly clean a headlight, you need to gather your materials. In order to properly do this task you will need to collect some rather specific items, or kits. Chances are that you won't have these items lying around the house you will need to make a run over to the local automotive parts store. Headlight cleaning kits will contain just about everything that you need, and a basic kit will cost you around $14.00. All headlight kits contain pretty much the same items. If you would rather make your own, then purchase one, here is what you will need.

Materials Needed:

  • Several sheets of wet-sanding paper in 1000, 1500, 2000, and 2500 grit sheets
  • Rubber or latex gloves
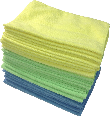
  • Clean soft cloths (like microfiber cloths) or clean soft rags
  • A bottle of plastic restoration polish

Procedure:

  1. Choose the day. It is usually preferable to do automotive cleaning, repairs, and restorations on a nice clear sunny day. That way you are outside in fresh air with plenty of space and ventilation, and enjoy the sunshine. If you cannot begin your project on a sunny day, or simply want to get it done as soon as possible, then as long as you have plenty of space, an area that can get wet with plenty of ventilation.
  2. Major imperfections. Begin by getting one of the headlights wet, after which you need to start sanding with the 1000 grit sand paper. Continue sanding until you have removed all the major imperfections on the lens. Only use the wet-sand type of sandpaper, as the other kind is not going to get you the results that you want. This step should take you about 30 minutes to do. However, it can take considerably longer depending on how foggy or dirty your headlights are. Conversely, it can take you almost no time at all. The key to know when to begin using the finer grit paper lies in noticing when the water and plastic runoff changes from a yellowish color to a more transparent and white color.
  3. Minor imperfections. After the major lens discoloration and imperfections have been removed with the 1000 grit wet-sandpaper, you are ready to move on. Repeat the process by using the 1500 and 2000 grit sheets. You will only need to spend about 15 on each sheet. An important thing to keep in mind when you are using sand paper is that when you change from the coarser to the finer, you should also be using less and less pressure, until finally you seem to be barely touching the paper to the headlight. Continue sanding with the 2500 grit paper as well, spending no more than 20 minutes on each headlight.
  4. Polish. Finally, polish the headlight till you bring it to a nice sheen. Simply apply the polish to the cloth you are going to use as an applicator and rub it in. Press down, using firm pressure and another clean, soft cloth or rag and begin polishing. While this process can take between 10 to 15 minutes for each headlight, you will love the results.

Author Bio

Doris Donnerman

Doris is a jack of all trades, writing on a variety of topics. Her articles have helped enlighten and entertain thousands over the years. ...

MORE FROM DORIS

Hiding or Removing Stretch Marks

Stretch marks are not just a problem that pregnant women are faced with. Anyone can get them, but how does someone either ...

Discover More

Easy Chicken and Rice Casserole

Chicken casserole can be a staple in any cook's kitchen. It is a great way to make a nourishing meal when time is short ...

Discover More

Removing PresStick from Carpeting

PresStick, or Blu-Tack as it is also known, can be both a blessing and a curse. A blessing in the sense that this ...

Discover More

Keep Your Hardwood Floors Like New Bona's hardwood floor cleaner is the #1 choice of professionals. The no-residue formula is specially designed to be safe for floors, families, and the environment. Check out Bona Hardwood Floor Cleaner Refill today!

More Cleaning Tips

Car Cleaning Products

When it comes to cleaning your car, you need to have the right items available. Get ready to wash your car by getting ...

Discover More

Removing Bumper Stickers

Want to remove those old bumper stickers from your car? There are several different methods that can be used to remove ...

Discover More

Wheel Cleaning

When cleaning your vehicle, don't forget the wheels. You can wash your car's wheels by following just a few simple steps.

Discover More
Subscribe

FREE SERVICE: Get tips like this every week in Cleaning Tips from Tips.Net. Enter your address and click "Subscribe."

View most recent newsletter.

Comments

If you would like to add an image to your comment (not an avatar, but an image to help in making the point of your comment), include the characters [{fig}] (all 7 characters, in the sequence shown) in your comment text. You’ll be prompted to upload your image when you submit the comment. Maximum image size is 6Mpixels. Images larger than 600px wide or 1000px tall will be reduced. Up to three images may be included in a comment. All images are subject to review. Commenting privileges may be curtailed if inappropriate images are posted.

What is 6 + 5?

There are currently no comments for this tip. (Be the first to leave your comment—just use the simple form above!)


Newest Tips
Subscribe

FREE SERVICE: Get tips like this every week in Cleaning Tips from Tips.Net. Enter your address and click "Subscribe."

(Your e-mail address is not shared with anyone, ever.)

View the most recent newsletter.