Cleaning the kitchen walls doesn't have to be a huge chore. Just be aware that there are some areas that are more troublesome than others. The area behind or around the stove can get greasy making it more difficult than other areas to clean. These troublesome areas will take a little longer and more elbow grease but with a good cleaning solution you will find that even the troublesome areas will be clean in no time.
When it comes to cleaning the kitchen walls usually all that is needed to keep the walls looking good is to do a good spot check, looking for smudges, fingerprints and other marks. Removing the smudges, fingerprints, grease marks, and other marks as you notice them will help in keeping the kitchen walls clean. If this is done on a routine basis, then the kitchen walls won't have to be washed that often.
Still there comes the time when the walls will have to be cleaned. Especially those greasy spots by the kitchen stove. It always helps to gather the cleaning supplies and have them all together when you begin any cleaning project.
Cleaning Supplies needed:
Gather all of the cleaning supplies so that they are together. Wait to add the water till later. You want to start by dusting the walls first. This can be done by either vacuuming the walls or taking your broom and wrapping an old clean towel around the whisks of the broom. Begin at the top and move left to right working your way down the wall. If you notice any places that will need cleaning take mental note of these spots. Don't forget about the baseboards and molding, they also need to be dusted and cleaned. If you are going to be washing the walls you will want to be sure to dust the baseboards before beginning to wash the walls. The dust from the baseboard will attract itself on to your cleaning sponge, and then you will have sponges that are needlessly dirty.
You are now ready to start cleaning the walls. In one bucket place two squirts of dishwashing liquid. Fill both buckets with warm water. You will want to use both buckets to avoid getting the cleaning solution bucket from getting to dirty too fast or putting some of the dirt that you've just taken off back onto the wall. Dip the sponge into the cleaning solution; squeeze the sponge so that the liquid is squeezed out. Gently wipe the surface of the wall.
Rinse the wall after cleaning it. Do this by dipping the second sponge into the bucket of clean water (bucket without any cleaning solution); squeeze the second sponge so that the warm water is squeezed out. Gently rinse the cleaning solution off the surface of the wall.
Start at the bottom of a corner of one wall working your way up. This will help to prevent the wall from getting streaks of the cleaning solution dripping water on to the walls leaving dirty streaks.
There may be some stains that won't come off with the simple cleaning solution. Take just a little bit of the baking soda and a little water and make a paste. Apply the paste to that stubborn stain and with a little scrubbing the stain should come right out. Rinse the area with clean water. When finished with cleaning the walls, be sure to take time and use the lint-free cloth to blot the walls dry.
Whether you are cleaning a painted wall or a wall that has been wall-papered the cleaning is basically the same. With the difference that you will want to be careful to test the papered wall in the corner to be sure that the cleaning solution will not harm the wall paper.

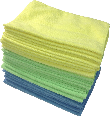
The Power of Microfiber! Zwipes Microfiber Cleaning Cloths will become your favorite tool for every cleaning task. This 36-cloth package is perfect for hundreds of uses in the garage, kitchen, bathroom, laundry, and all around the house. Each cloth is tough, streak-free, lint-free, reusable, and washable. Check out Microfiber Cleaning Cloths today!
Teflon is perhaps one of the most popular choices in nonstick cookware. As such, the chances of you having at least one ...
Discover MoreWood cutting boards, especially those used for meat, can build up bacteria and stains quickly. Lemon juice is a huge help ...
Discover MoreTo ensure the best food quality and service, a commercial kitchen must be properly cleaned and maintained. Each day, ...
Discover MoreFREE SERVICE: Get tips like this every week in Cleaning Tips from Tips.Net. Enter your address and click "Subscribe."
There are currently no comments for this tip. (Be the first to leave your comment—just use the simple form above!)
FREE SERVICE: Get tips like this every week in Cleaning Tips from Tips.Net. Enter your address and click "Subscribe."
Copyright © 2026 Sharon Parq Associates, Inc.
Comments