Felt gaskets are an important item on a dryer that most people never stop to think about. These items are what helps keep felt, or lint, from your clothes getting down into the heating elements of the dryer. In short, these gaskets are one of the things that are in place to help prevent a potential fire from happening. By periodically cleaning felt gaskets, and when necessary replacing them, you are going to not only help extend the life of your dryer but also ensure that there is a lower possibility of a fire.
When cleaning felt gaskets, there are simply put two options that are available to you. The first is that you can do the work yourself, and the second is that you can hire someone to do the work for you. Each of these options has their high points in addition to their drawbacks. Before you begin, carefully consider all of your options and assess the time and skill that you have available to you. If you are unsure as to your skill with mechanical things, then do not begin doing the repairs yourself.
Do it yourself.
One option that you have for cleaning felt gaskets is to do the work yourself. Before you begin cleaning or repairing the felt gasket yourself, you need to make sure that you know what you are doing. If you have never done this type of work before, this means that you will need to spend some time studying the owner's manual. Each and every dryer while fundamentally the same type of machine is going to be different and should be handled as such. This means that you need to know the manufacturer's preferred method for doing the work.
Once you have finished reading the owner's manual, assemble all of the tools necessary for replacing the gasket. While you may not need to actually replace the gasket, it never hurts to have the materials on hand if you do. Begin wiping the gasket clean with some rubbing alcohol, working in one direction as you do this. As you are wiping the gasket, take time to inspect the gasket for any signs of wear and tear. If you come across any tears, rips, or dry rot then you need to begin replacing the gasket according to the directions in the owner's manual. Continue to rub the alcohol along the gasket until the rag you are using comes away completely clean. When it does, allow the alcohol to completely dry, and then repeat the process using regular water. Allow the water to completely dry before you begin using the dryer again.
Hire a professional.
The easiest possible method for cleaning or repairing a felt gasket is to simply hire a repair person to do the work for you. While this method is more expensive than doing the work yourself, you are guaranteed to have the job done right, and to have it done by a person who knows what they are doing. In addition, by hiring someone to do the work for you, you don't run the risk of voiding your warranty.
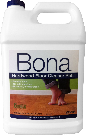
Keep Your Hardwood Floors Like New Bona's hardwood floor cleaner is the #1 choice of professionals. The no-residue formula is specially designed to be safe for floors, families, and the environment. Check out Bona Hardwood Floor Cleaner Refill today!
Candles, though romantic, can cause quite the mess if you are not careful. A spilled candle can end up causing wax to go ...
Discover MoreEnergy is something to think about in today's world and it also concerns your bank account. Be conscious of the energy ...
Discover MoreA dryer is an extremely convenient household appliance, but it can also be dangerous. Dryers can be a possible source for ...
Discover MoreFREE SERVICE: Get tips like this every week in Cleaning Tips from Tips.Net. Enter your address and click "Subscribe."
There are currently no comments for this tip. (Be the first to leave your comment—just use the simple form above!)
FREE SERVICE: Get tips like this every week in Cleaning Tips from Tips.Net. Enter your address and click "Subscribe."
Copyright © 2026 Sharon Parq Associates, Inc.
Comments